Installing phpMyAdmin
BACK
PHP
MySQL
http://prdownloads.sourceforge.net/phpmyadmin/phpMyAdmin-2.8.0.3.zip?download
Rename the folder so it is simply "phpmyadmin".
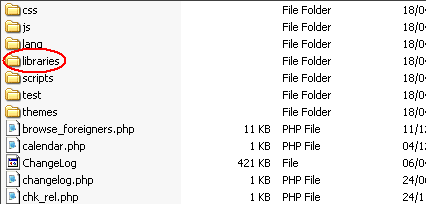
Go to "htdocs/phpmyadmin/libraries".
Find the file "config.default.php".
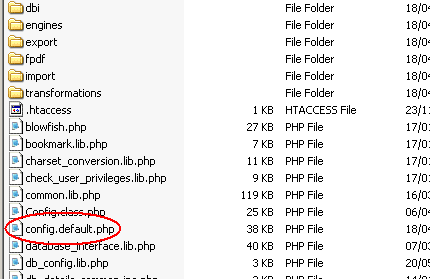
Right click it and click "copy". Now return to "htdocs/phpmyadmin".
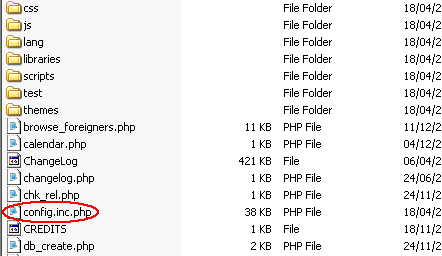
Right click and click "paste". Now rename the copied "config.default.php" to "config.inc.php".
Now open the new file "config.inc.php" in a text editor such as "wordpad" (note pad may not work in this situation as the encoding is different and the lines are seperated in a different way.
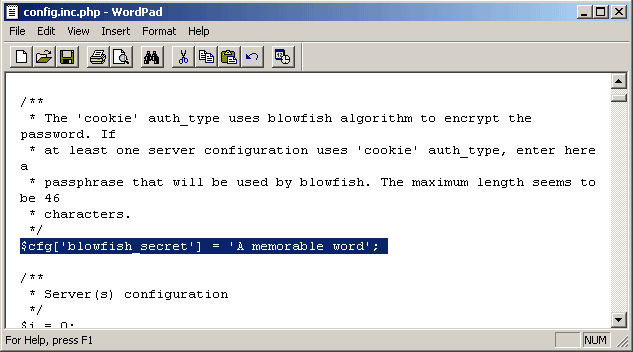
Find the line highlighted below and change "A memorable word" to something you can easily remember, but not something too obvious like your name.
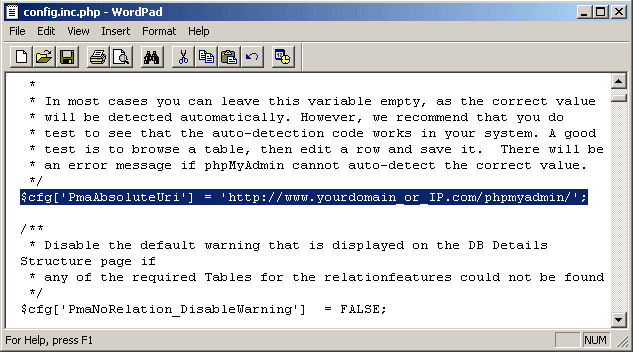
Now find the line highlighted below and change "http://www.yourdomain_or_IP.com/phpmyadmin/" to the URL or IP address of your server and the path to phpMyAdmin. Remember the trailing "/".
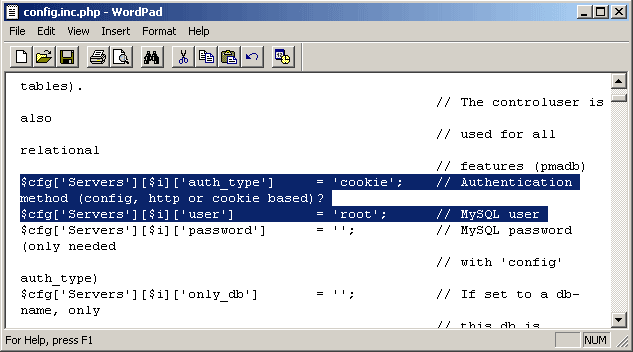
Now find the lines highlighted below and change set them to the ones you see in the image.
Save the file with the text editor.
Now browse to the location of phpMyAdmin (www.yourdomain.com/phpmyadmin for example).
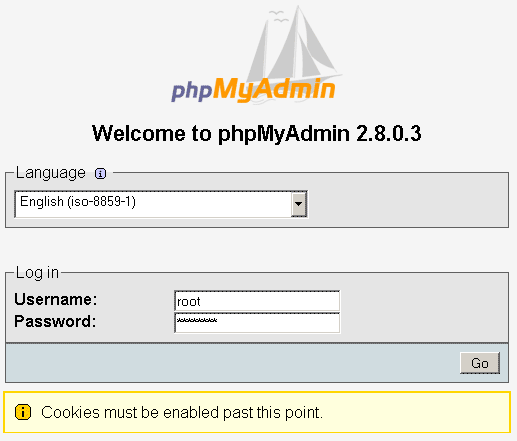
You will be asked for a username and password. Enter "root" as the username and the password you chose for MySQL, then click "Go".
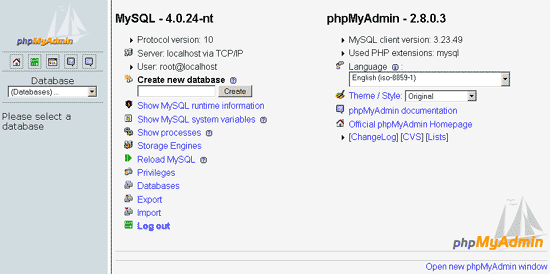
Thats it. You have completed the installation of phpMyAdmin. You can now add users, change your password, edit tables etc with phpMyAdmin.
Change the Index File
Installing Selisoft Active HTML
Installing a DNS Server
Installing Filezilla FTP Server
Installing hMailServer Mail Server
Installing MySQL Database Server v4.1
Installing PHP
Installing phpBB
Installing ActiveState Python
Installing ActiveState Ruby on Rails
Port forward your router
Or go back to the AbyssUnderground homepage
Requirements
Compatible versions of:PHP
MySQL
Step 1: Downloading
If you have downloaded a complete package, you will already have one of the files below. However if you haven't you need to download the phpMyAdmin package from:http://prdownloads.sourceforge.net/phpmyadmin/phpMyAdmin-2.8.0.3.zip?download
Rename the folder so it is simply "phpmyadmin".
Step 2: Installing/Configuring
Before we start installing we need to make some changes to some files.Go to "htdocs/phpmyadmin/libraries".

Find the file "config.default.php".

Right click it and click "copy". Now return to "htdocs/phpmyadmin".
Right click and click "paste". Now rename the copied "config.default.php" to "config.inc.php".

Now open the new file "config.inc.php" in a text editor such as "wordpad" (note pad may not work in this situation as the encoding is different and the lines are seperated in a different way.
Find the line highlighted below and change "A memorable word" to something you can easily remember, but not something too obvious like your name.

Now find the line highlighted below and change "http://www.yourdomain_or_IP.com/phpmyadmin/" to the URL or IP address of your server and the path to phpMyAdmin. Remember the trailing "/".

Now find the lines highlighted below and change set them to the ones you see in the image.

Save the file with the text editor.
Now browse to the location of phpMyAdmin (www.yourdomain.com/phpmyadmin for example).

You will be asked for a username and password. Enter "root" as the username and the password you chose for MySQL, then click "Go".

Thats it. You have completed the installation of phpMyAdmin. You can now add users, change your password, edit tables etc with phpMyAdmin.
Finished
Related Pages
Change the Index File
Installing Selisoft Active HTML
Installing a DNS Server
Installing Filezilla FTP Server
Installing hMailServer Mail Server
Installing MySQL Database Server v4.1
Installing PHP
Installing phpBB
Installing ActiveState Python
Installing ActiveState Ruby on Rails
Port forward your router
Or go back to the AbyssUnderground homepage